Labels
A-level work
Artists references
Chromatography
Collage
Colour
Cutouts
Embroidery
Gallery Visits
Holiday
Illustrator
Inspiration
Intentions L5
Kite project
L5 Summer Project
L6
Live Brief
Locating L5
My Exhibitons
Nature
New Designers
Oil and Water
Origins project L4
PE Task 2
Photography
Photoshop
Print
Sampling Project L4
Shadows
Shrink
Sketchbooks
Typography
Unit X
Unit X L5
Unit X L6
website
Weekly meetings
Work Experience
Showing posts with label Chromatography. Show all posts
Sunday, 17 February 2013
A car window drying!
This weekend, we took advantage of the weather to wash the cars, but as it was drying, I spotted this lovely pattern forming on the window, which I thought looked like my chromatography work. The colours of the setting sun make this pattern even more interesting.
Sunday, 10 February 2013
Machine Embroidery - Week 1!
This week I have started machine embroidery. As I haven't done much work on machines before, I spent the week doing lots of small samples to help me get to know how they work and the kind of techniques that can be achieved.
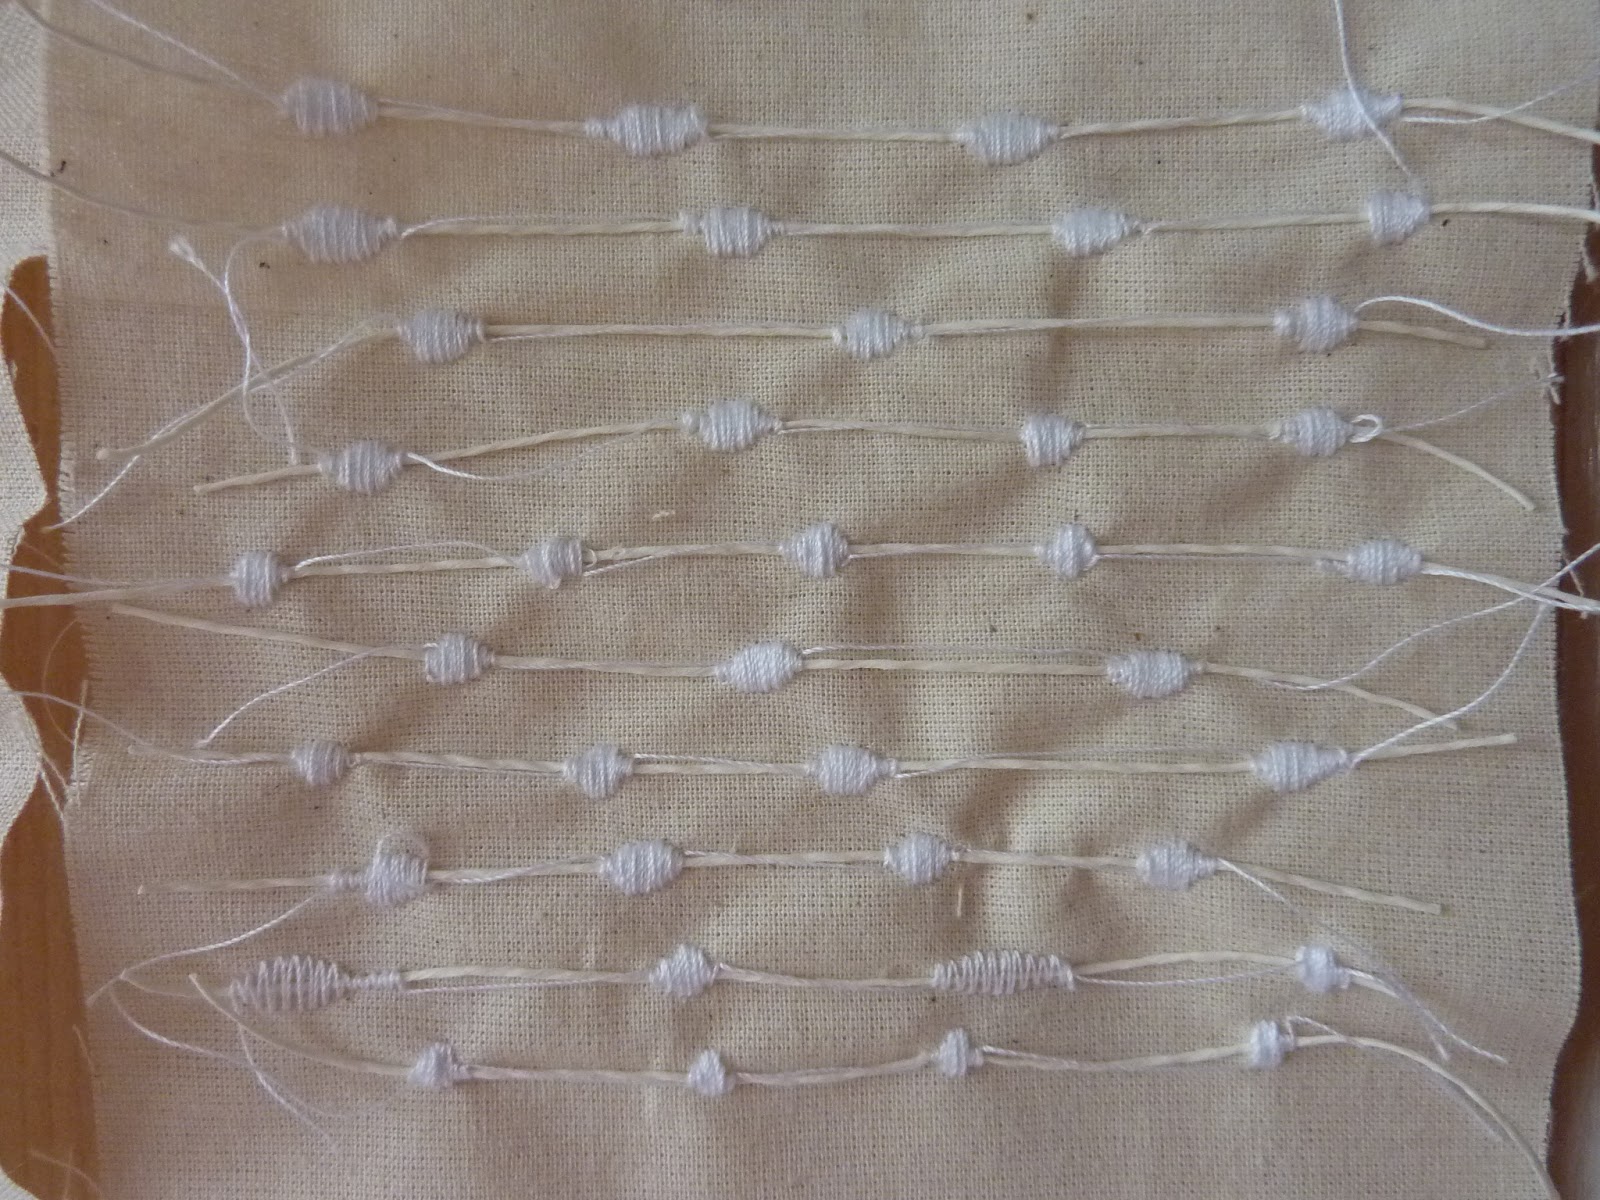
We were inducted into the machines with the number 6 Bernina foot which had a small hole in the centre to couch narrow chords. This is shown in the example below where I have cut away some of the zig zag stitch to reveal the chord.
I did couching on this sample with satin stitch, creating small ovular shapes at intervals along the chord.
Towards the end of the week, I tried to incorporate chromatography with some of my samples.
For this sample, I stitched pieces of cotton onto a base fabric so that they were free standing to create a 3D sample. They also had different heights to create a rippled effect with the fabric, which I then did chromatography on top of. I liked how vibrant the colours ended up, and I also like the 3D aspect of the sample so I would like to develop this further.
We were inducted into the machines with the number 6 Bernina foot which had a small hole in the centre to couch narrow chords. This is shown in the example below where I have cut away some of the zig zag stitch to reveal the chord.
I also experimented with this fabric which was easy to manipulate. When it was pulled apart, threads were left behind which also added to the texture. The fabric naturally became 3D, however I stuffed the natural shapes to re-enforce this.
For this sample, I stitched pieces of cotton onto a base fabric so that they were free standing to create a 3D sample. They also had different heights to create a rippled effect with the fabric, which I then did chromatography on top of. I liked how vibrant the colours ended up, and I also like the 3D aspect of the sample so I would like to develop this further.
I also wanted to see how lots of line stitch would be effected by chromatography. I used one continuous thread as I wanted to see how the colour would travel. I placed the ink on the left hand side (where there is a high concentration of purple) and as you can see, the colour travelled all over the sample due to the linking threads behind the sample.
Throughout the next week I would like to develop my chromatography with machine stitch, to create some bigger samples.
Sunday, 3 February 2013
Developing my hand stitch with chromatography!
This week I have finished my 3 weeks in hand stitch. Towards the end, I really got the hang of linking my chromatography with stitch. At the start of the 3 weeks I tried to represent the chromatography data in my sketchbook with stitch but this week I have incorporated the two much better to create some lovely results.
For this sample I did chromatography on white embroidery thread and used this to sew with.
I did another example in the same way; with some white thread, and some with chromatography on. I then added drops of more water to make the ink run. As the fabric underneath was water resistant, the few threads that did absorb the water created this lined pattern.
I then worked out that if I washed the fabrics with washing up liquid, I could make them absorbent which is what I did with the following example. I wanted to see how different stitches reacted with the chromatography.
I liked the french knots in the example above because they look on colour at a different rate to the surrounding fabric. I therefore did a sample with just french knots.
In the left sample, I did chromatography on string and sewed a pattern representing inks movement through chromatography. The sample on the right had the same pattern but in white thread, which I then did chromatography on top of.
The french knots in this sample had a lovely range of colours
The french knots here really took on the vibrant colours of the ink.
When I move onto machine stitch I will be experimenting with the same ideas, seeing how different stitches and fabrics act when I apply chromatography.
Friday, 1 February 2013
Hand Embroidery Data Samples
This week our task was to produce samples samples samples! I enjoyed linking my embroidery techniques to my data, as I didn't know how I could do this until I got stuck in. It took me a while to get into the swing of things, but I managed to link my data well!
One of my favourite experiments from my sampling involved doing Chromatography on Scrim. It's an easily manipulatable fabric, meaning I could pull holes in it easily, and stitching on top of this proved to be one of my favourite techniques, tying my whole project together.
I'm happy with the samples that I have produced but after doing these samples I felt as though all of my ideas were exhausted and stuck for inspiration. After various feedback sessions this week my ideas have been growing and for my next ten samples I am going to employ some of the following ideas:
As I have two tangents to my project, being chromatography, and oil and water, I am very glad that I had both of these ideas to work with. The circular patterns of the oil and water provided a good base for stitch, whilst I could also use patterns from Chromatography. I also did Chromatography on paper and fabric and used these in my samples. I'm now glad that I can link the ideas that I had from both of the tangents in my work back together in my embroidery samples to show development.
At one point in my sampling, I started to zoom into some of the patterns created by my resist chromatography, and represent this in stitch.
- Use stitch to show the path of chromatography (e.g.take it out of the water half way through and sew where the ink is up to)
- Stitch a piece in white first and then add chromatography to see how it affets my work
- Only put chromatography on part of my fabrics and add stitch to emphasise its pattern (e.g. just a little dot of chromatography)
- I'll also try dipping an inked sample in water, letting it dry and then trying to re-do the chromatography with the existing line of ink.
- Try resists on fabrics
Sunday, 16 December 2012
Chromatography resist experiments.
This week I have been experimenting with how I can make my chromatography more interesting. Normal chromatography forms a line of colour at a certain point on the paper, but I want to create pieces with more colour in the white space. I decided to try out different resists and liquids that I found around the house to see what affect they would have on my experiments. All of these were done with one line of black marker at the bottom, and the results are very different! Here are a few of my favourites.
They all seemed to pull the colour along the page much more, and they created lots of interesting patterns and effects.
Friday, 14 December 2012
Drawing from my Chromatography
After doing so many experiments with chromatography, I wanted to start drawing from them and developing my ideas further.
| This page in my sketchbook consists of two of my chromatography experiments (small) and a bigger representation of the separated colours using gouache. |
I then decided to see if I could abstract my work even further by taking some of the line qualities and pattern from these sketchbook pages and translate it into a drawing which doesn't obviously show chromatography.
Saturday, 8 December 2012
Finding a direction for my data!
There is so much data around us, from obvious charts and graphs, to addresses in our address book and the finger prints on our fingers. I really wanted to chose a project theme that would push myself out of my comfort zone, and to give me and the people who view my work, some food for thought. I decided to look at the hidden data within colour, looking at how they mix together, and the colours that different colours are made up of.
I've started the project by looking at a well known method of separating the colours that make up different colours: chromatography. I have recorded the data from different brands of black marker pens and coloured felt tips. Below is a video which I created from taking pictures of my chromatography experiment involving the separation of 5 different coloured felt tips. I took a picture every ten seconds, for ten minutes, to see how the colours separated in various pens.

I've started the project by looking at a well known method of separating the colours that make up different colours: chromatography. I have recorded the data from different brands of black marker pens and coloured felt tips. Below is a video which I created from taking pictures of my chromatography experiment involving the separation of 5 different coloured felt tips. I took a picture every ten seconds, for ten minutes, to see how the colours separated in various pens.
After doing a very simple experiment I tried to make my data look more interesting, and experiment with mixing colours, and patterns to see what the results were. Here are some of my most interesting results, created using different techniques.
I found it interesting to watch how my patterns and pictures distorted when in water, and I have learnt a lot about chromatography. For example, the more ink you have, the slower the water travels, but when there is no colour in the way, water travels quicker. This is what created the bumps and lumps on the line where the water stopped.
Subscribe to:
Posts (Atom)